Launch Agents
Launching your Agents into your own cloud environment enables capabilities such as:
- Talking to your Agents in Slack through a Slack Assistant
- Invoking Agents to perform tasks from external tools using HTTP webhooks
- Executing scheduled Reports and Workflows
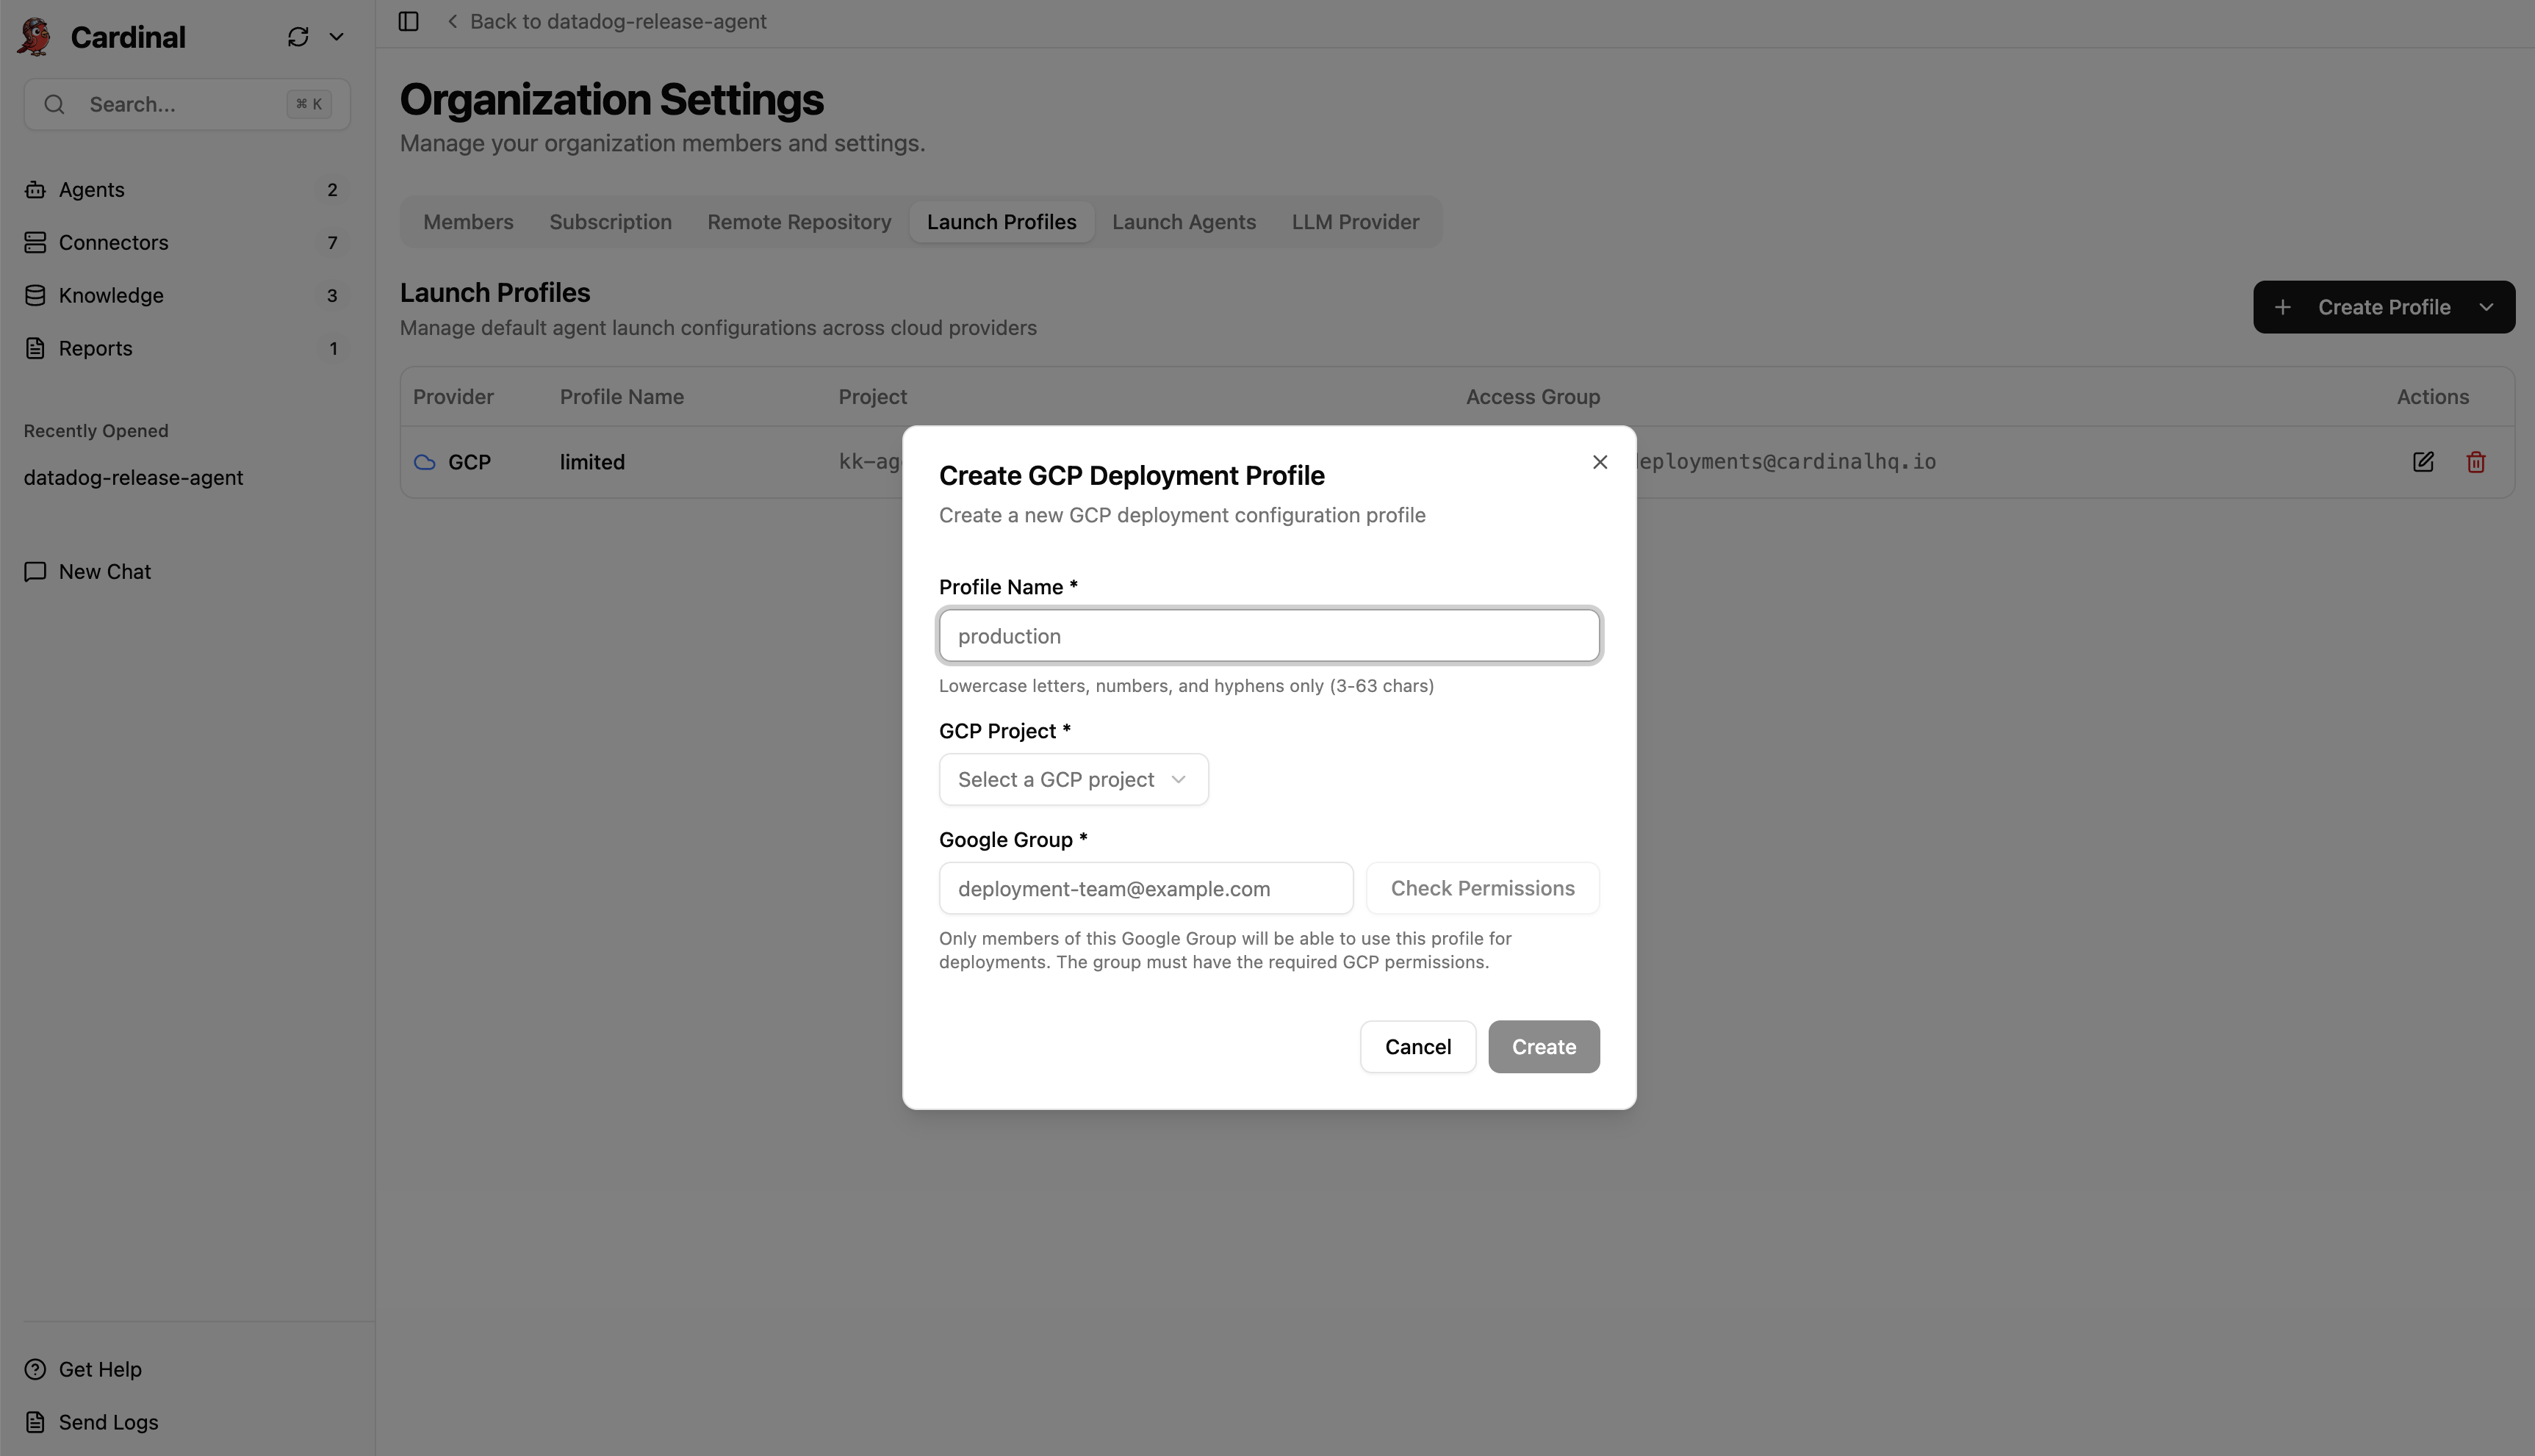
1. Create a Launch Profile
Launch Profiles are used to configure the cloud environment in which your Agents will be launched.
-
In the Cardinal Desktop Application, click on your name in the bottom-left corner, and select the Organization Settings menu item.
-
Select the Launch Profiles tab.
-
Click on the Create Profile button, and select your cloud provider (GCP, AWS, or Azure).
-
Give the profile a name, select the GCP Project that you would like to deploy into, and enter a Google Group containing members that should have permissions to deploy to this project.
-
Click Create to save the profile.
2. Launch Agents
You are now ready to launch your Agents into your cloud environment.
-
In the Cardinal Desktop Application, click on your name in the bottom-left corner, and select the Organization Settings menu item.
-
Select the Launch Agents tab.
-
Click the Launch Agents button.
-
Select the Launch Profile that you created in the previous section, then hit Launch to deploy your Agents.
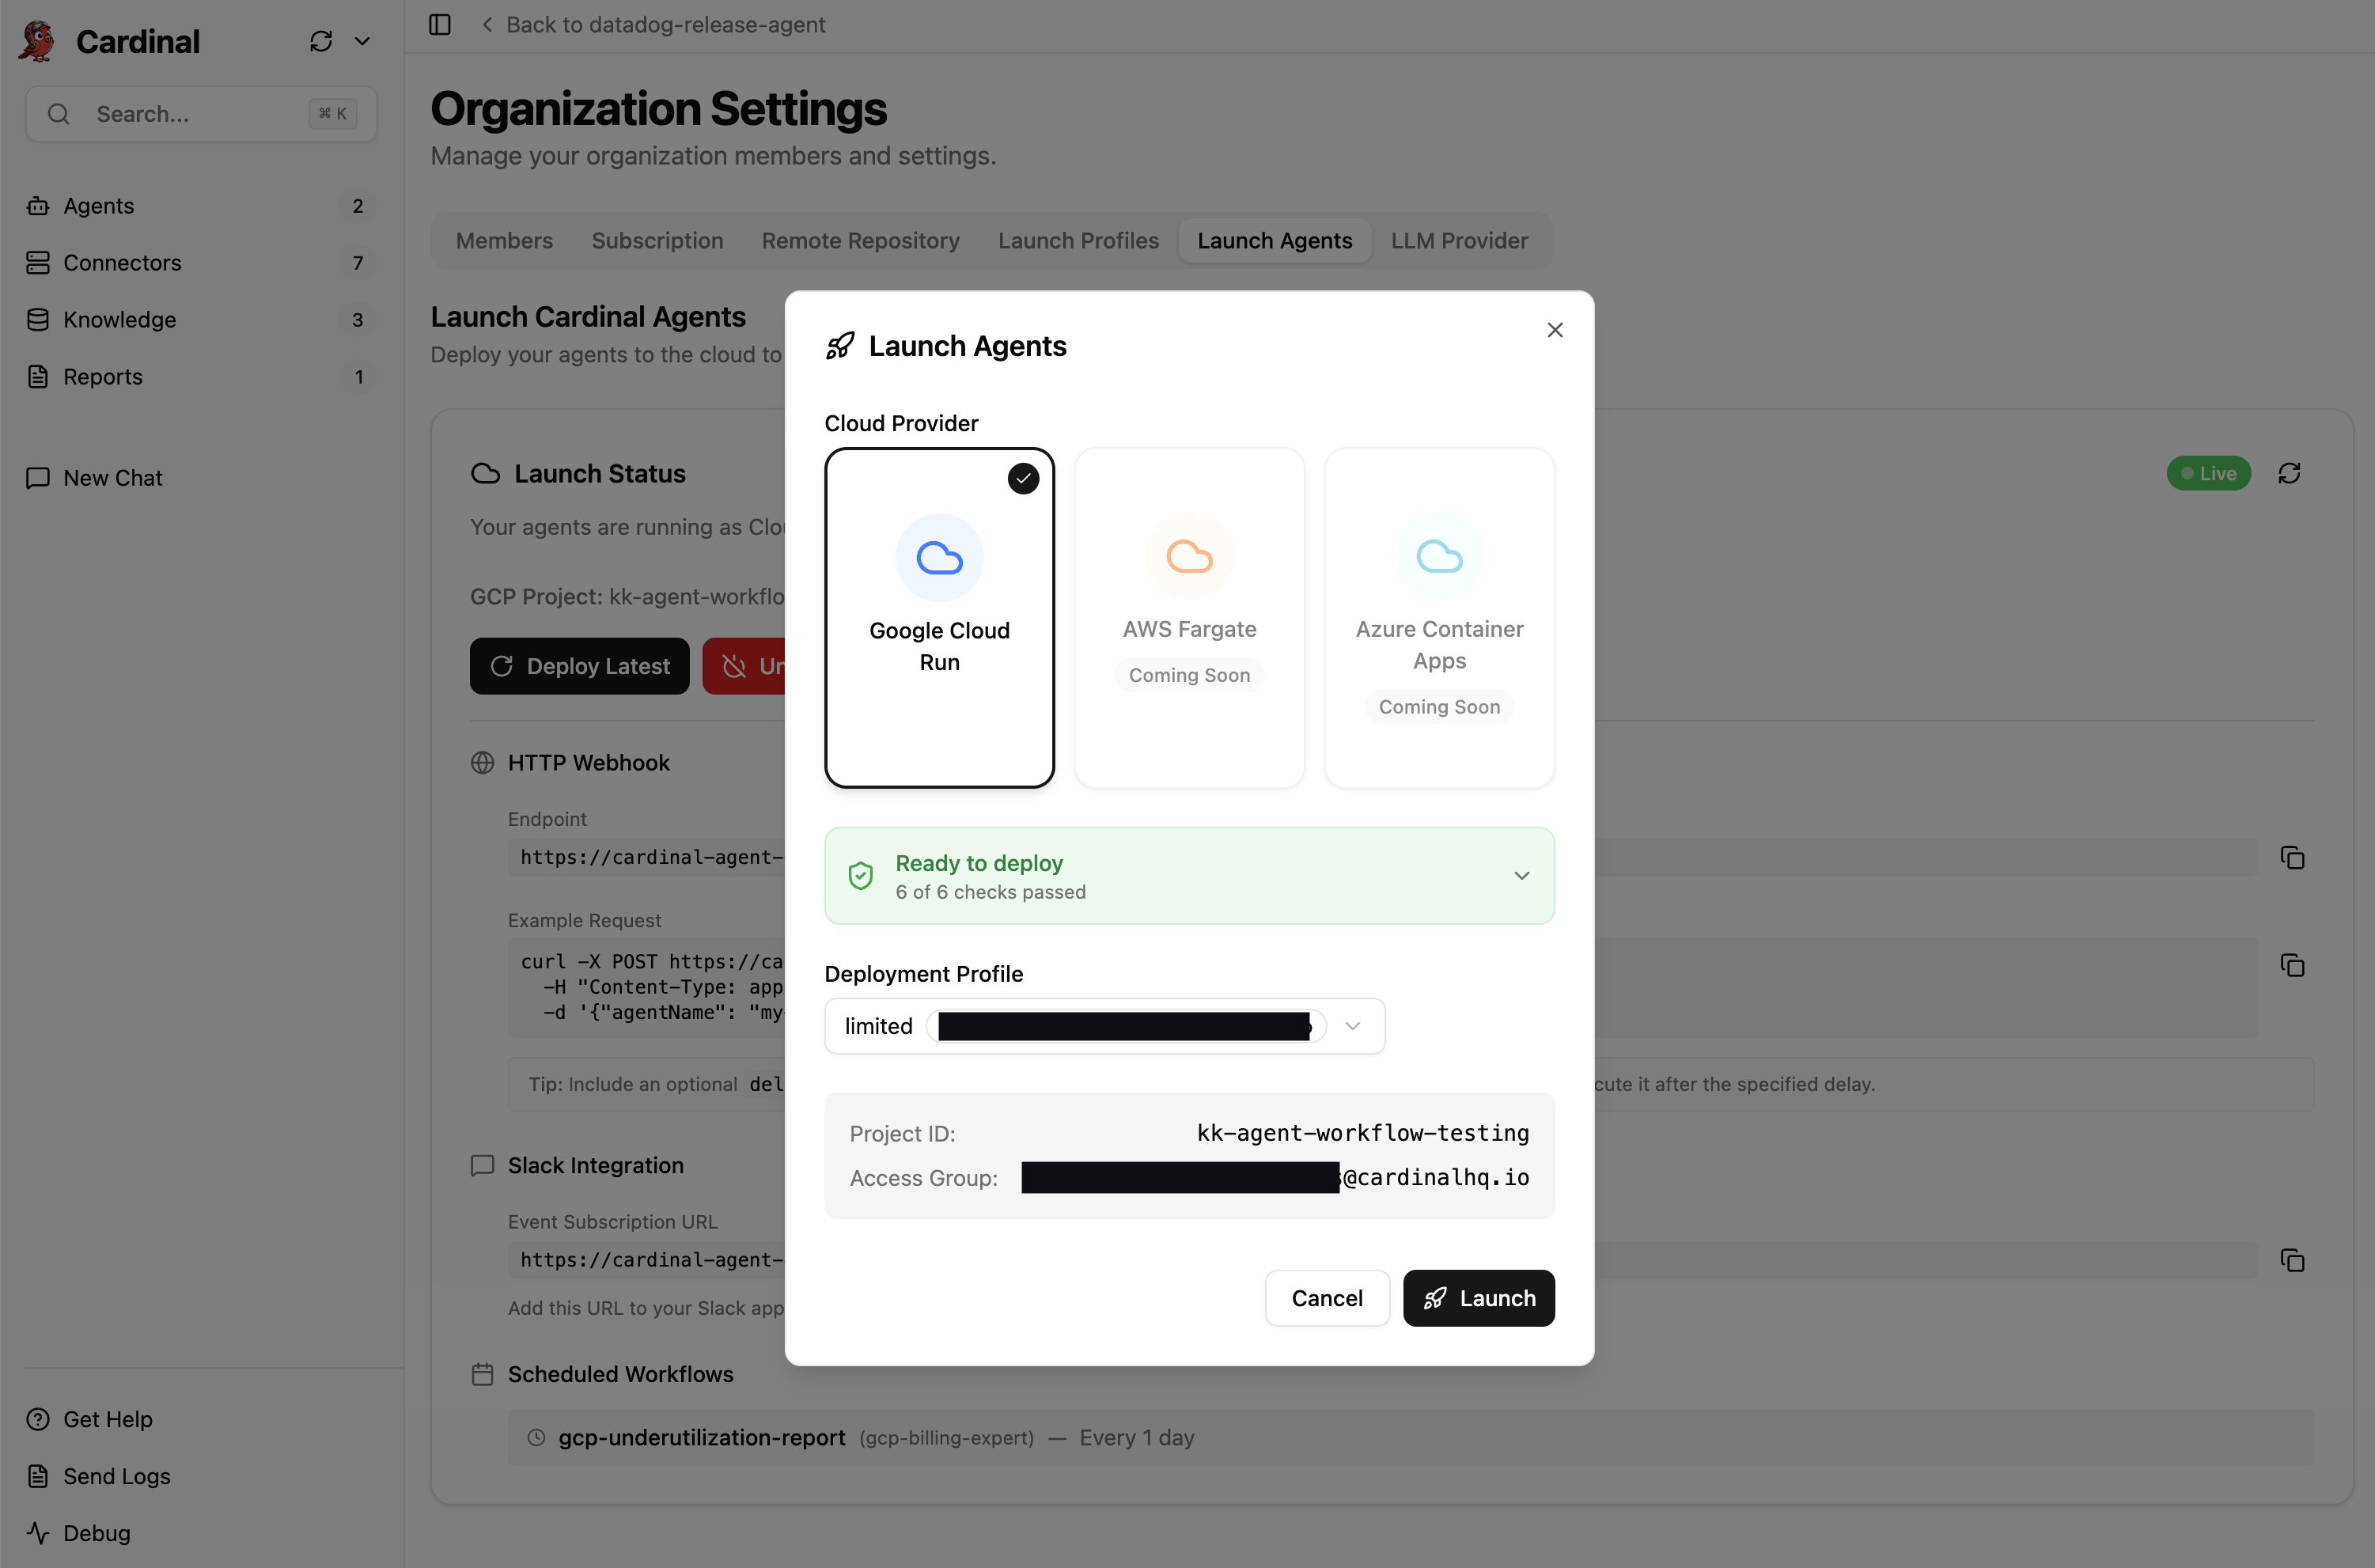
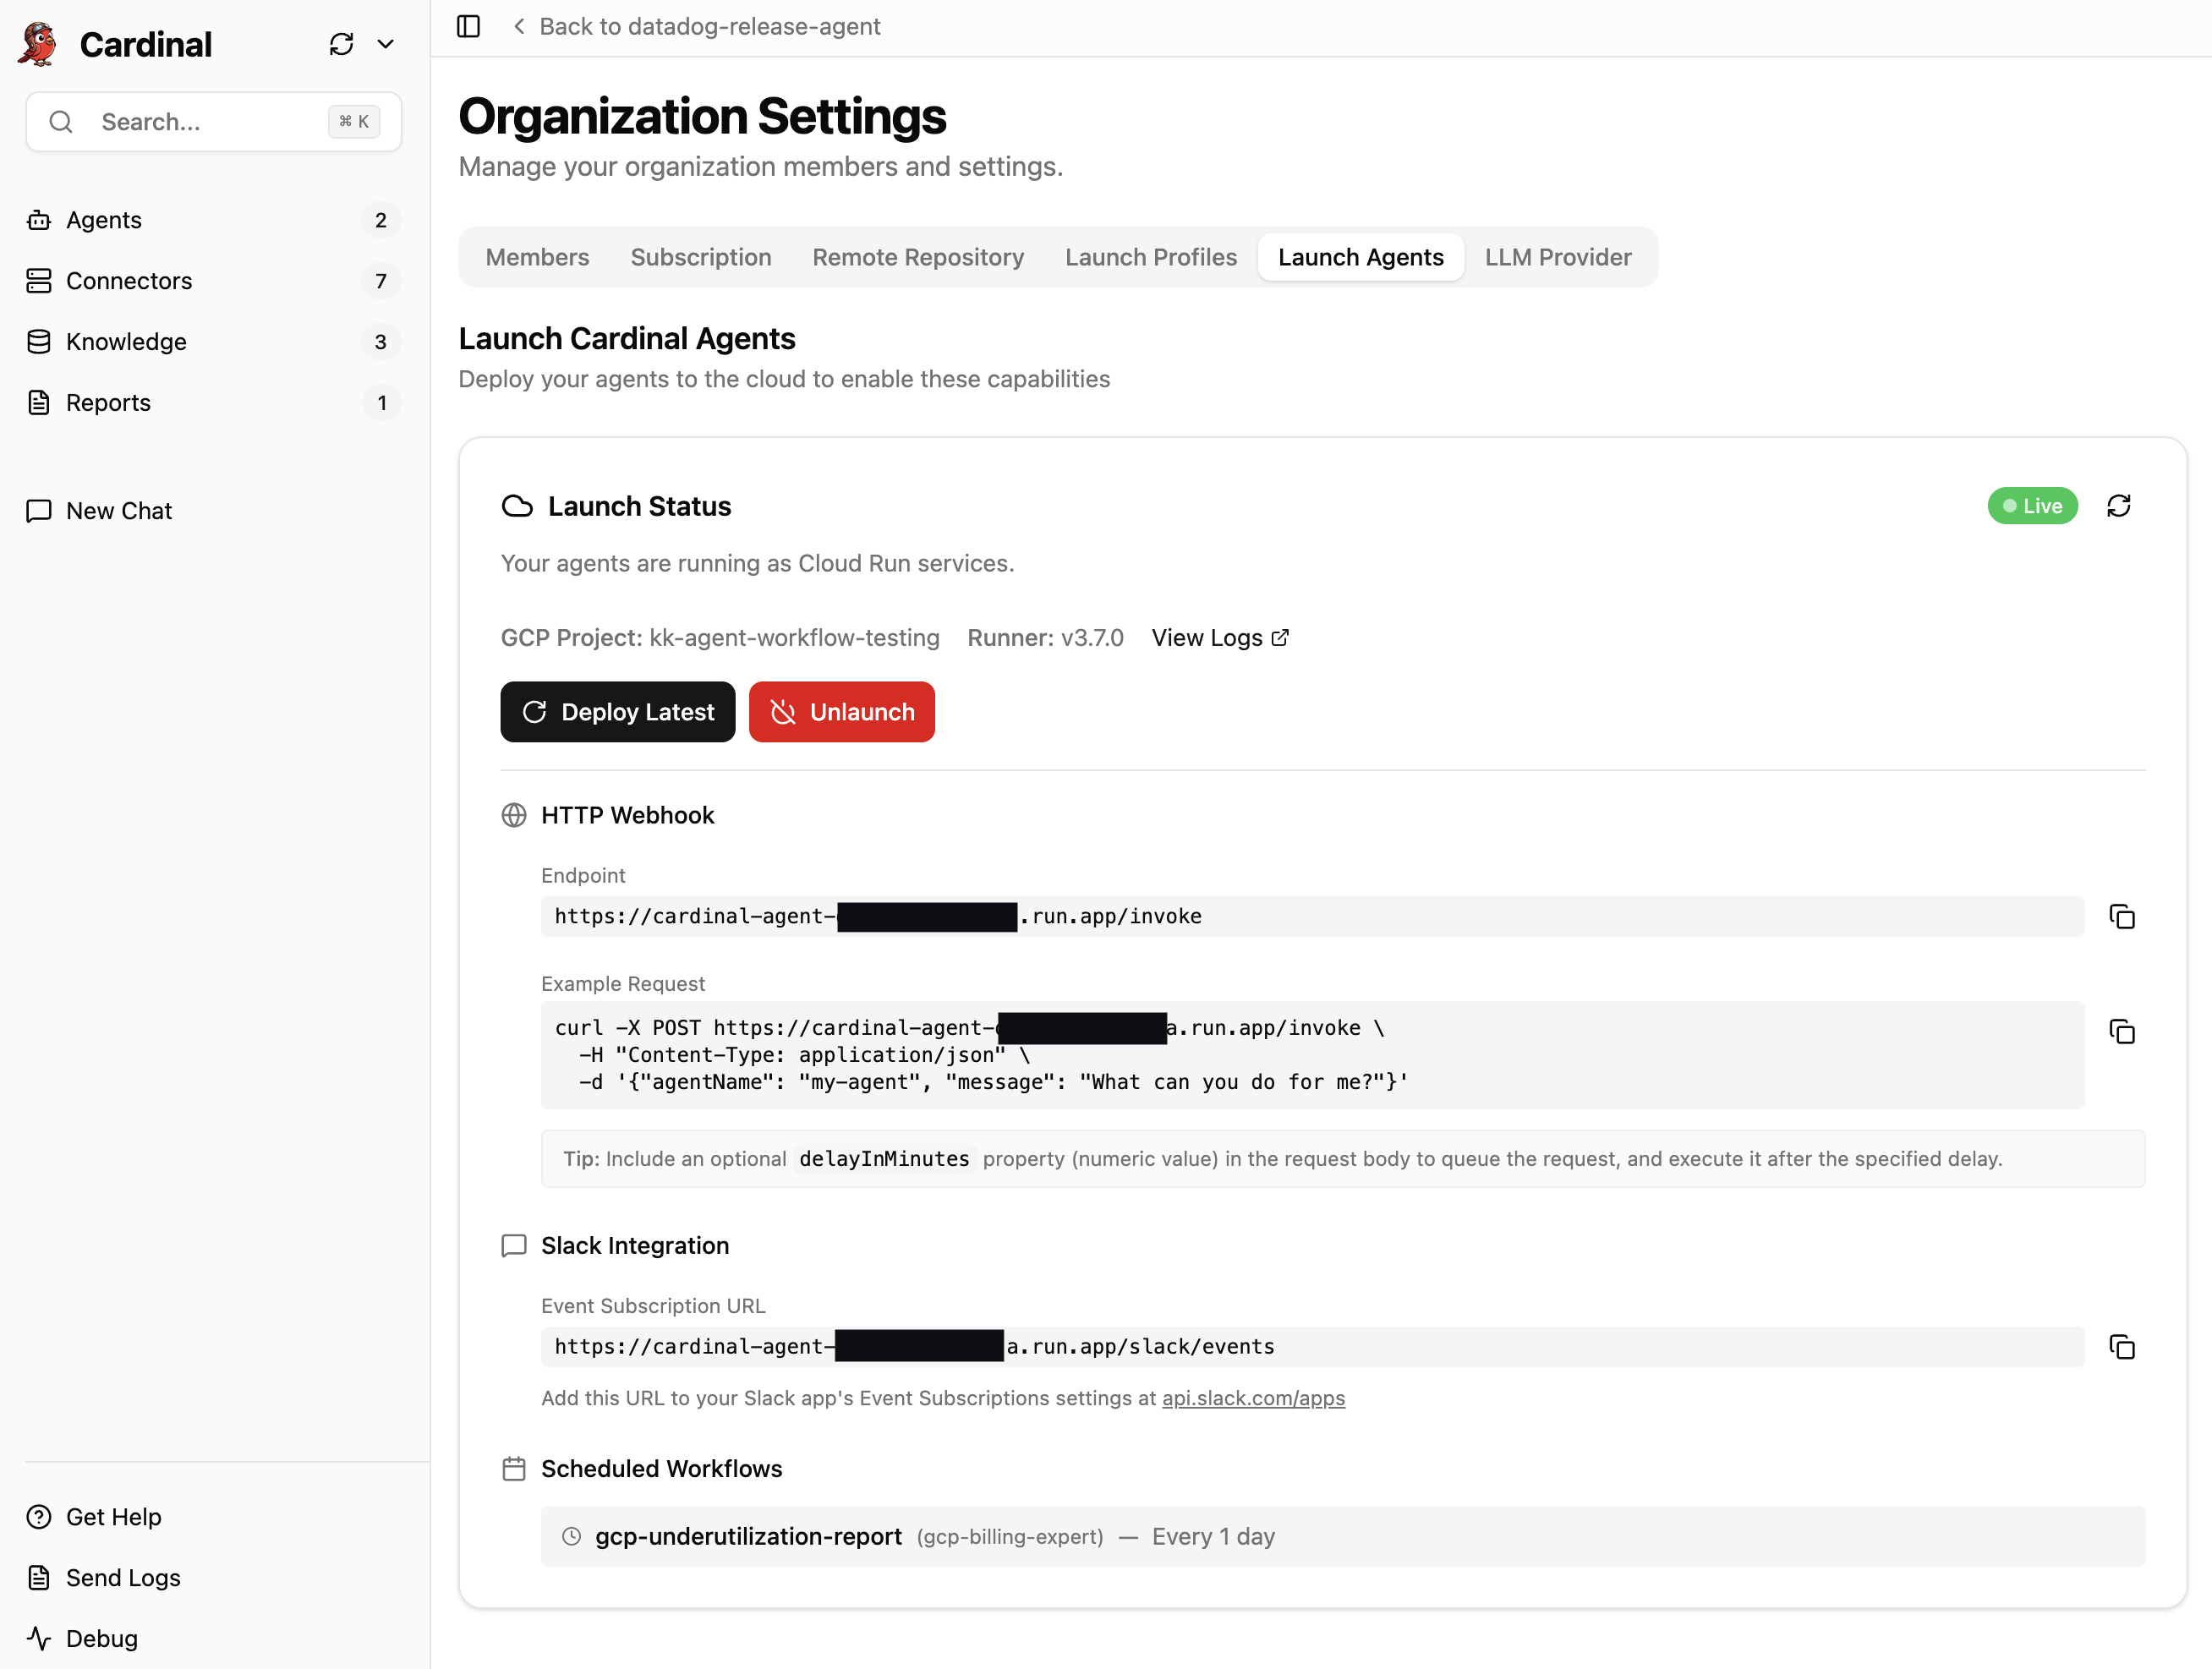
- You will see progress indicators showing the status of the deployment. Once the deployment is complete, the Launch Status card shows the status of the deployment.
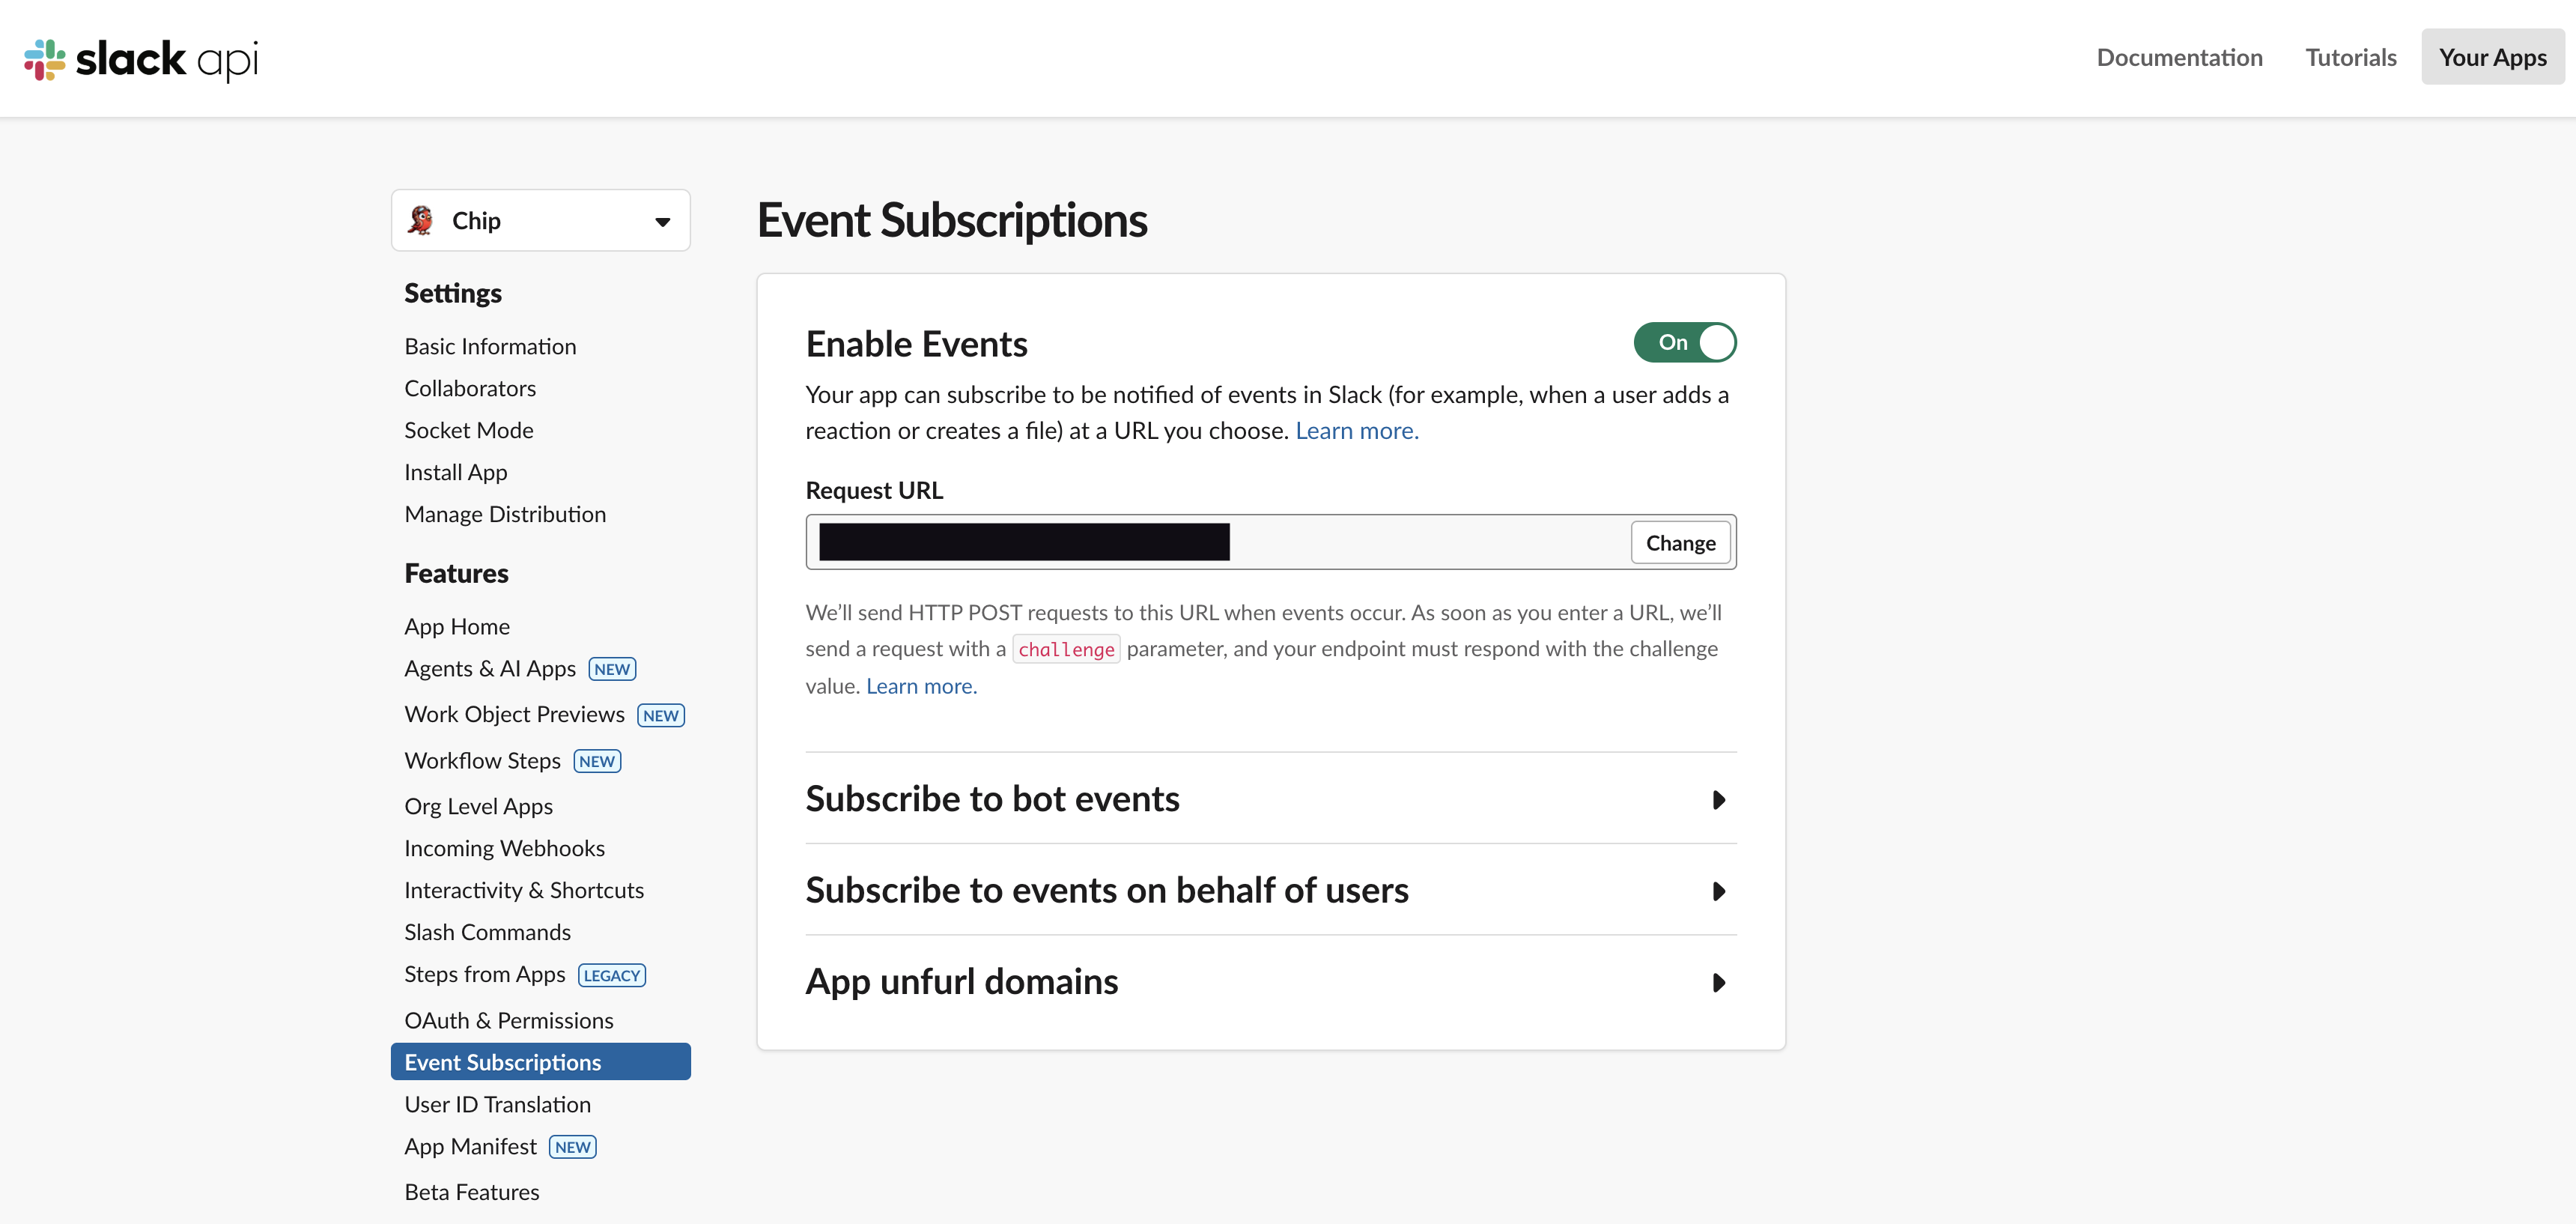
3. Configure Slack Event Subscriptions
If a Slack Connector is configured in your workspace, the Launch Status card will include an Event Subscription URL that must be configured in your Slack bot app in order to talk to your Agents in Slack.
-
Follow the link to https://api.slack.com/apps (opens in a new tab).
-
Select the Slack bot app that you created when adding the Slack Connector.
-
Select the Event Subscriptions tab from the sidebar.
-
Copy the Event Subscription URL from the Launch Status card, and paste it into the Request URL field.
4. Invoke Agents via HTTP Webhook
Once your Agents are launched, you can invoke them from external tools (e.g. GitHub Actions, etc.) to perform tasks via a /invoke HTTP webhook.
The Launch Status card includes your HTTP webhook URL, and an example cURL command to invoke an Agent.
curl -X POST https://{your-agent-url}/invoke \
  -H "Content-Type: application/json" \
  -d '{"agentName": "my-agent", "message": "Perform this task"}'
The request body must be a JSON object with the following fields:
agentName: (required) The name of the Agent to invokemessage: (required) The message to send to the AgentdelayInMinutes: (optional) The number of minutes to delay the task execution (e.g.30)
Requests without a delayInMinutes are executed synchronously, and return the results of the task execution. Requests with a delayInMinutes are executed asynchronously, and return immediately with the time that the task will be executed.